Okta & Other SCIM Directories
Any SCIM-enabled user directory or Identity Provider (IDP) can be configured to automatically provision phone directories within NEONNOW.
This guide uses Okta as an example, however this SCIM principles can be applied to any other SCIM-enabled directory.
The following are a list of pre-requisites for this integration:
- NEONNOW Admin Access – to configure the new NEONNOW directory
- IDP/Directory admin access – to configure an application
- IDP/Directory user & group setup – a user group should be set up, that your users are members of
- All users that will be ingested should have a valid E164 phone number configured. Note – this phone number field should have any spaces removed to ensure the Call History search functions correctly in NEONNOW
Adding a New External Directory
Once the pre-requisites are complete, to add a new Directory click the Add Directory button on the Contact Centre > Customise > Integrations > External Directories page. If you have not added any other external directories, this button will be in the middle of the page, otherwise, the top right as per the screenshot below.
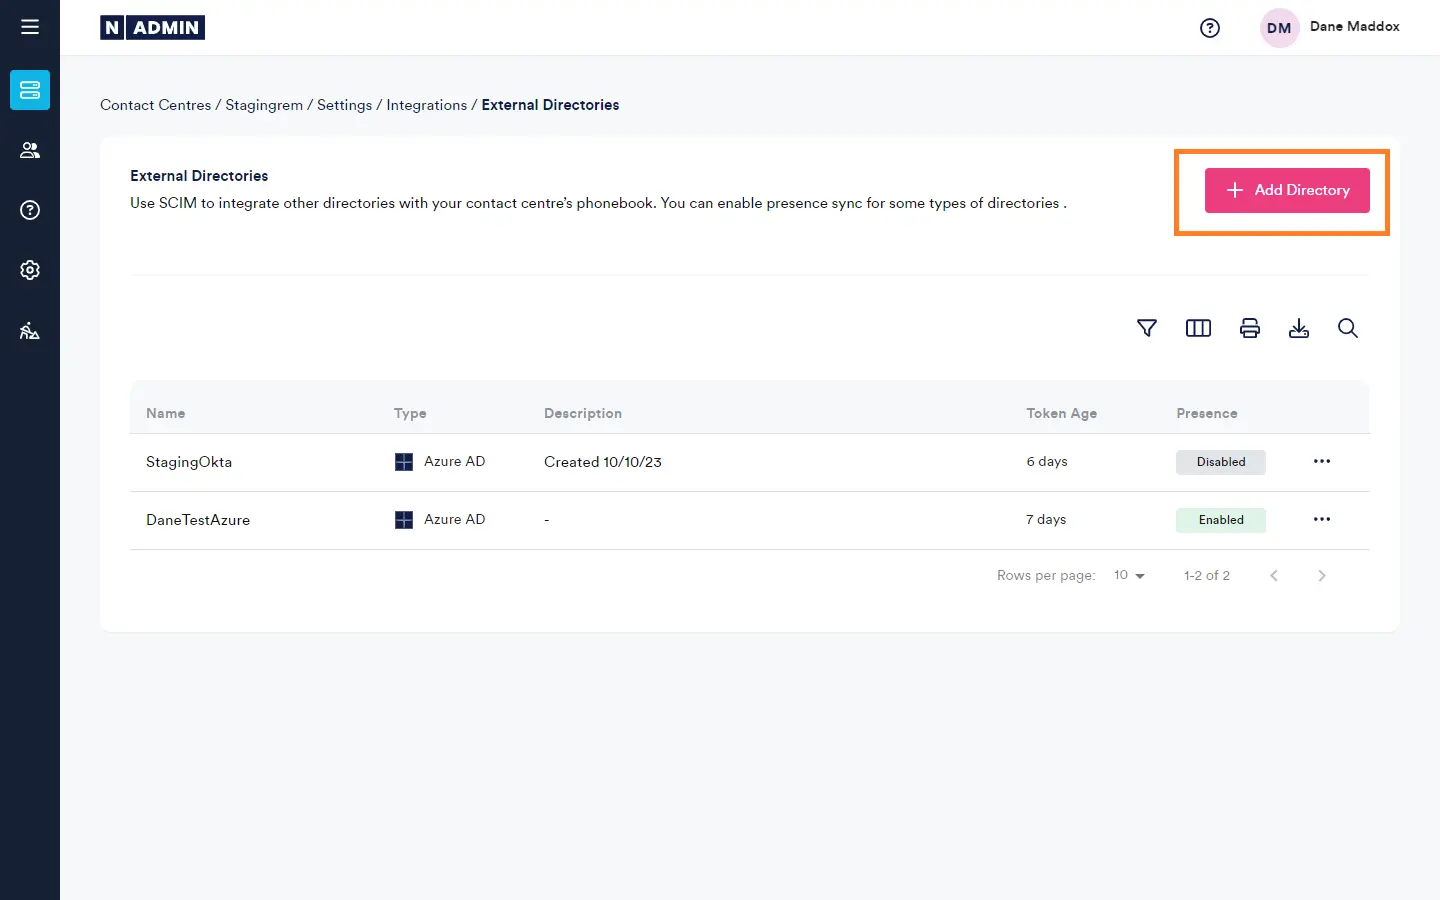
External directories list page in admin
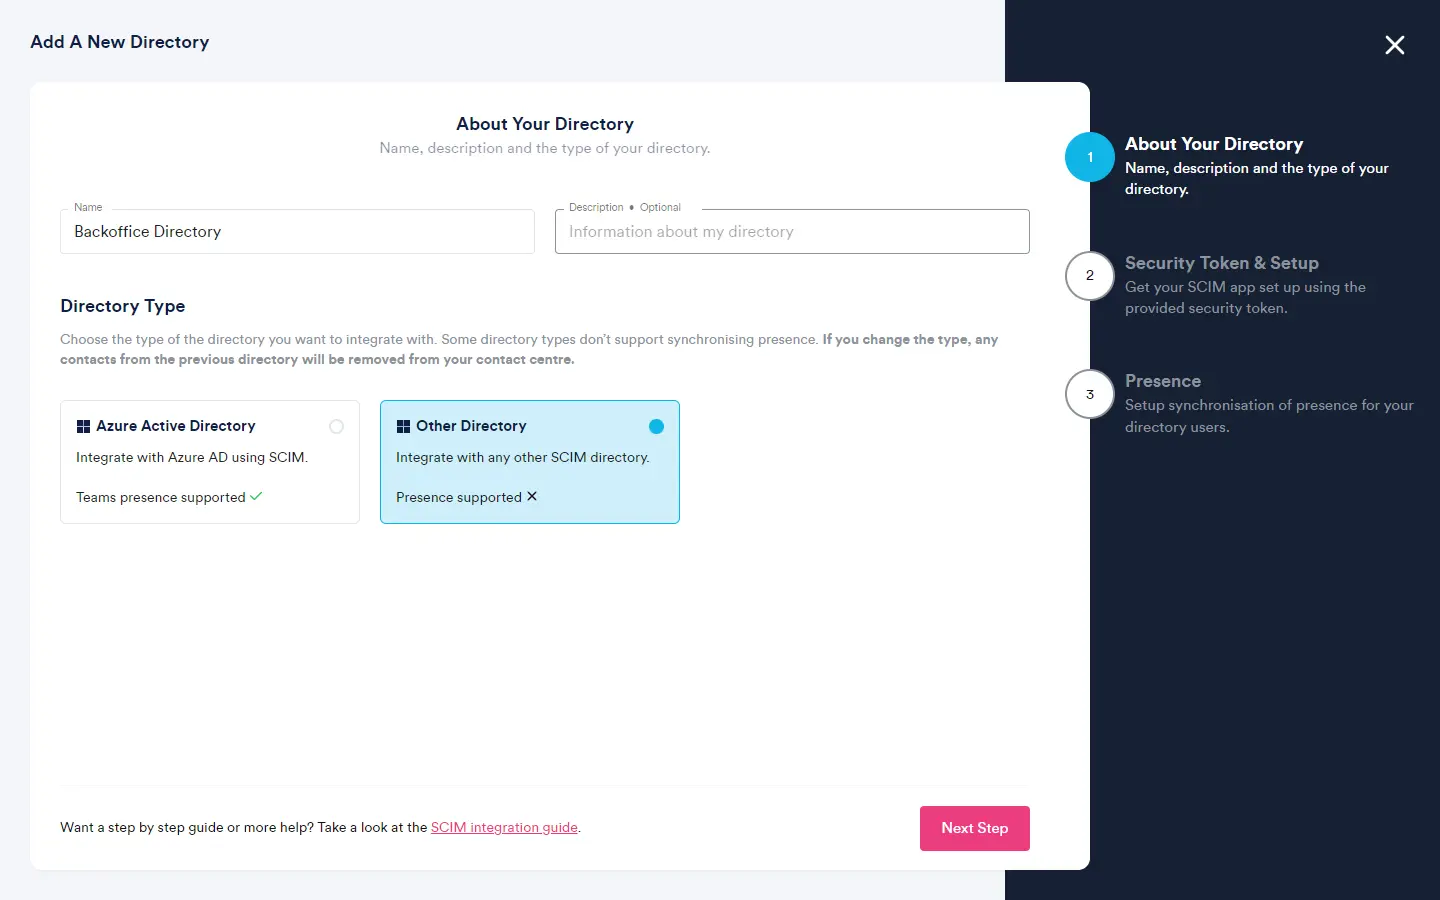
Setup in Admin
- Enter a meaningful name & click
Other Directorythen clickNext Step.
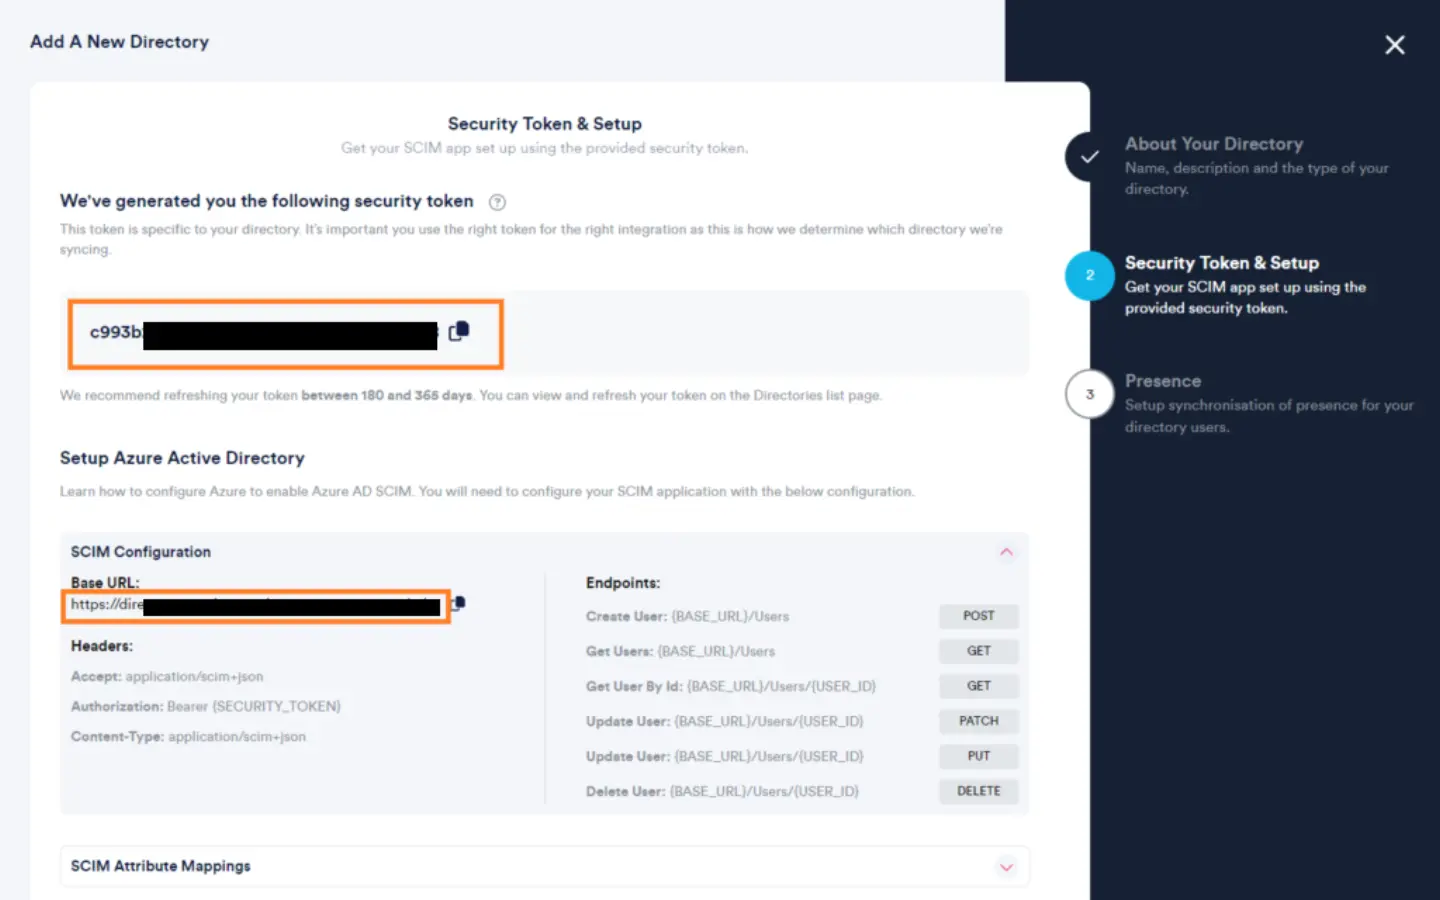
- Take a note of the security token (save it somewhere secure) that is displayed and expand
SCIM Configurationand save the base URL. You will need these later in the setup (but you can come back to it). Then, click theNext Stepoption.
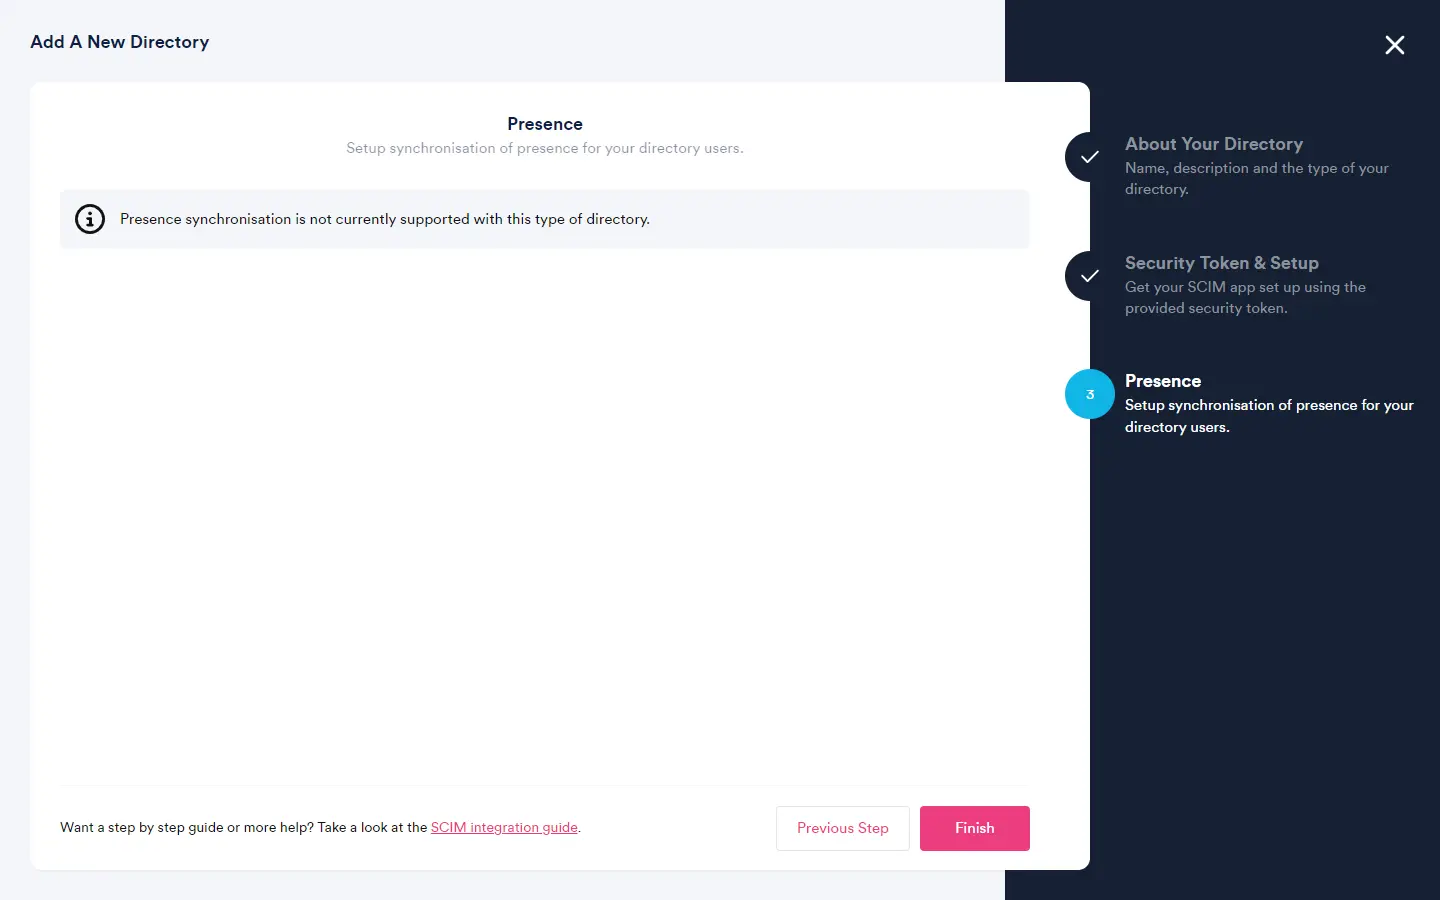
- Simply click
Finish.
Setup On Okta
Now, the NEONNOW configure is complete, and it is time to configure the SCIM application in the User Directory system, in this case, Okta.
- Sign in to the Okta Portal
- Click Applications, then
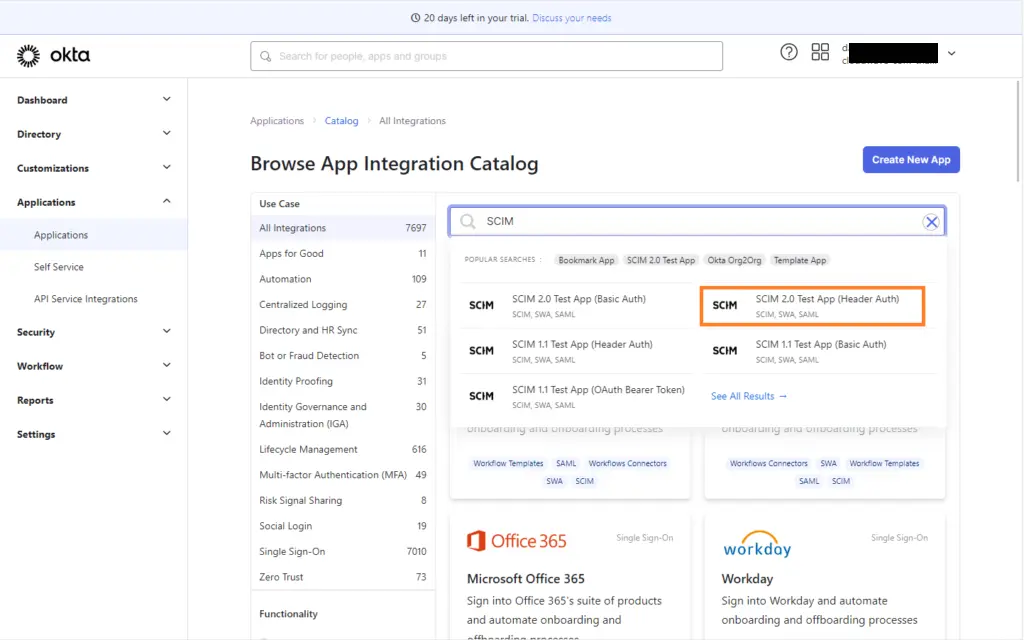
Browse App Catalog - In the search bar, enter
SCIMand clickSCIM 2.0 Test App (Header Auth), thenAdd Integration
- Provide a name in the
Application Labelfield underGeneral Settingsand clicknext - Accept defaults on
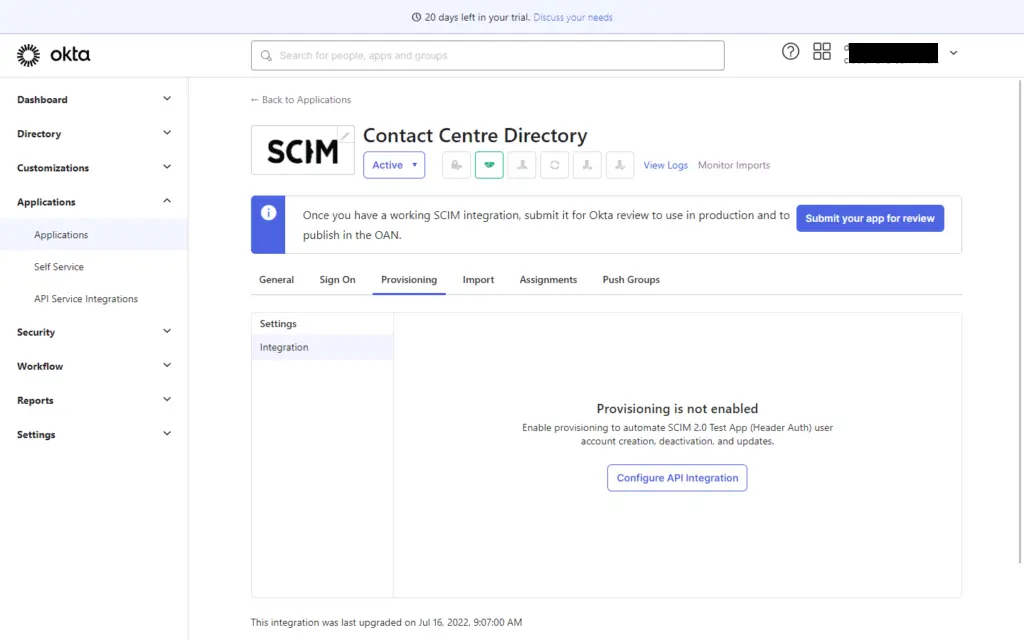
Sign-On Optionspage & clickDONE - Now navigate to the
Provisioning Taband clickConfigure API Integration, then tickEnable API Integration
- In the
Base URL, enter the URL saved from NEONNOW in earlier step - In the
API Token, enterbearer{APIKEY}``. e.g. if your API key is ABC123, enterbearer ABC123(without single quotes). - Now click
Test API Credentials. Below shows a screenshot of the successful test. ClickSave.

- On the Provisioning tab, under
To AppclickEditand ensure the following tick-boxes are set:

- Scroll down to
Attribute Mappingssection, and ensure that the mapping are set exactly like below
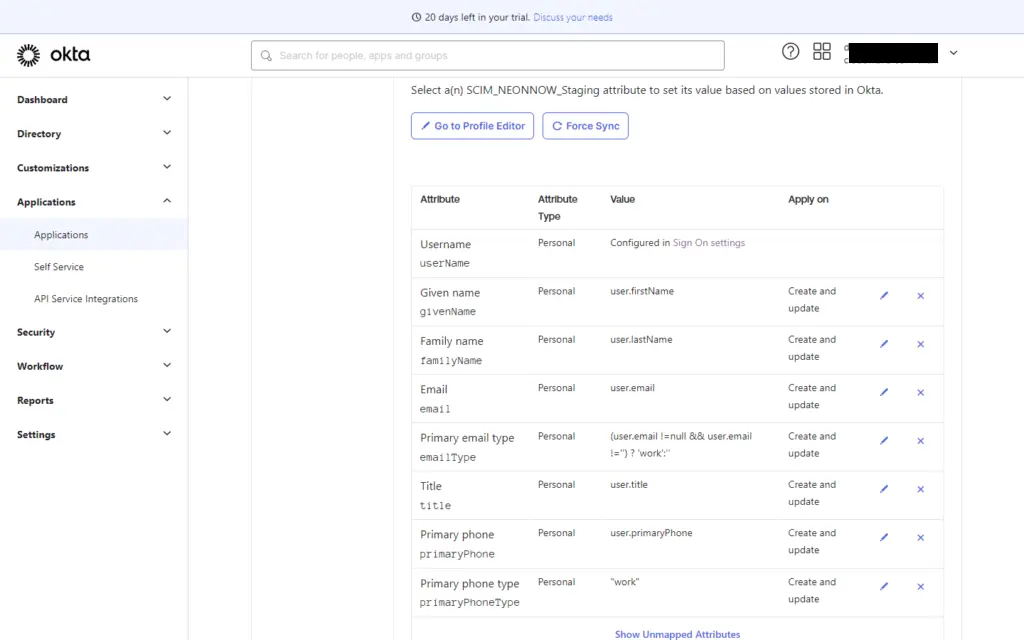
You can also reference the NEONNOW mappings in the directory wizard screen, which contains the following information:
| Directory Attribute | SCIM Attribute |
|---|---|
| userName (or equivalent) Required string | userName |
| id (or equivalent) Required string | externalld |
| phoneNumber (or equivalent) Required E164 string | phoneNumbers[type eq "work"].value |
| firstName (or equivalent) Optional (surname provided) string | name.givenName |
| lastName (or equivalent) Optional (given name provided) string | name.familyName |
| email (or equivalent) Optional string | emails[type eq "work"].value |
| jobTitle (or equivalent) Optional string | title |
- Now navigate to the
Assignmentssection` and add a group or set of users. This should trigger provisioning automatically. Check Reports/System Log in Okta to check for any issues
External Directory Contacts in NEONNOW
External contacts should now load in the Organisation tab of Directory within NEONNOW. Selecting a contact avatar will display more information about the contact.
You may need to reload NEONNOW if the directory did not exist when it was first loaded.

More information about a contact in NEONNOW