External Provisioning
Introduction
The SCIM User Provisioning feature allows automatic synchronization of users from an Idp (identity provider) such as Entra ID or Okta with NEONNOW and Amazon Connect. This eliminates the need for manual user management across platforms, reducing errors and saving time.
Planning your SCIM Deployment
To plan a deployment of NEONNOW SCIM integration first requires careful planning of user personas and groups. Each group will be a combination of the following attributes
-
Amazon Connect Security Group(s) - this can either out of the box Amazon Connect Security Groups(s) or custom one(s)
-
An Amazon Connect Routing Profile - Single Routing Profile, defining a set of Queues for routing
-
A NEONNOW user type - one of Manager, Supervisor, Agent
Segmentation of users into these groupings is defined by the SCIM field ‘Department’. This may be mapped from the IdP’s department field, or some custom field.
SCIM Mappings
The following provides an overview of the fields that can be mapped.
| Entra ID User Property | Entra ID Attribute | SCIM Attribute |
|---|---|---|
| User principal name | userPrincipalName (or equivalent) | userName |
| Object ID | objectId (or equivalent) | externalId |
| First Name | givenName (or equivalent) | name.givenName |
| Last Name | surname (or equivalent) | name.familyName |
| Active | Not([IsSoftDeleted]) (or equivalent) | active |
| Business phone or Mobile phone | telephoneNumber or mobile (or equivalent) | phoneNumbers[type eq "work"].value |
| Department | department (or equivalent) | urn:ietf:params:scim:schemas:extension:enterprise:2.0:User:department |
All but phone number & Department are mandatory
- Phone Number - if this is included - it MUST confirm to E164 numbering
- Department - if this is not included, or is included and does not match a defined department mapping, then the defined ‘default mapping’ will be used.
Setting up your SCIM Integration
The following is a high level guide on the order of operation for a SCIM Deployment.
Step 1 - Define user mapping
Specifically, decide how department (or equivalent) field will be used, and map out all permutations of Amazon Connect Security Profile, Routing Profile and NEONNOW user type. This is typically done in a table/spreadsheet etc.
Default User Mappings
Define the default Contact Centre Role, Amazon Connect Routing Profile & Amazon Connect Security Profile. These will be utilized, when a department match is not found.
Step 2 - NEONNOW Admin interface Configuration
Within NEONNOW, under Configuration/Users, navigate to the ‘External Provisioning’ section. Firstly enable this via the top toggle - note only one SCIM interface can exist per NEONNOW Contact Centre. Create Default mappings, which will be utilized when a department mapping does not match.
If desired, generate a new security token.
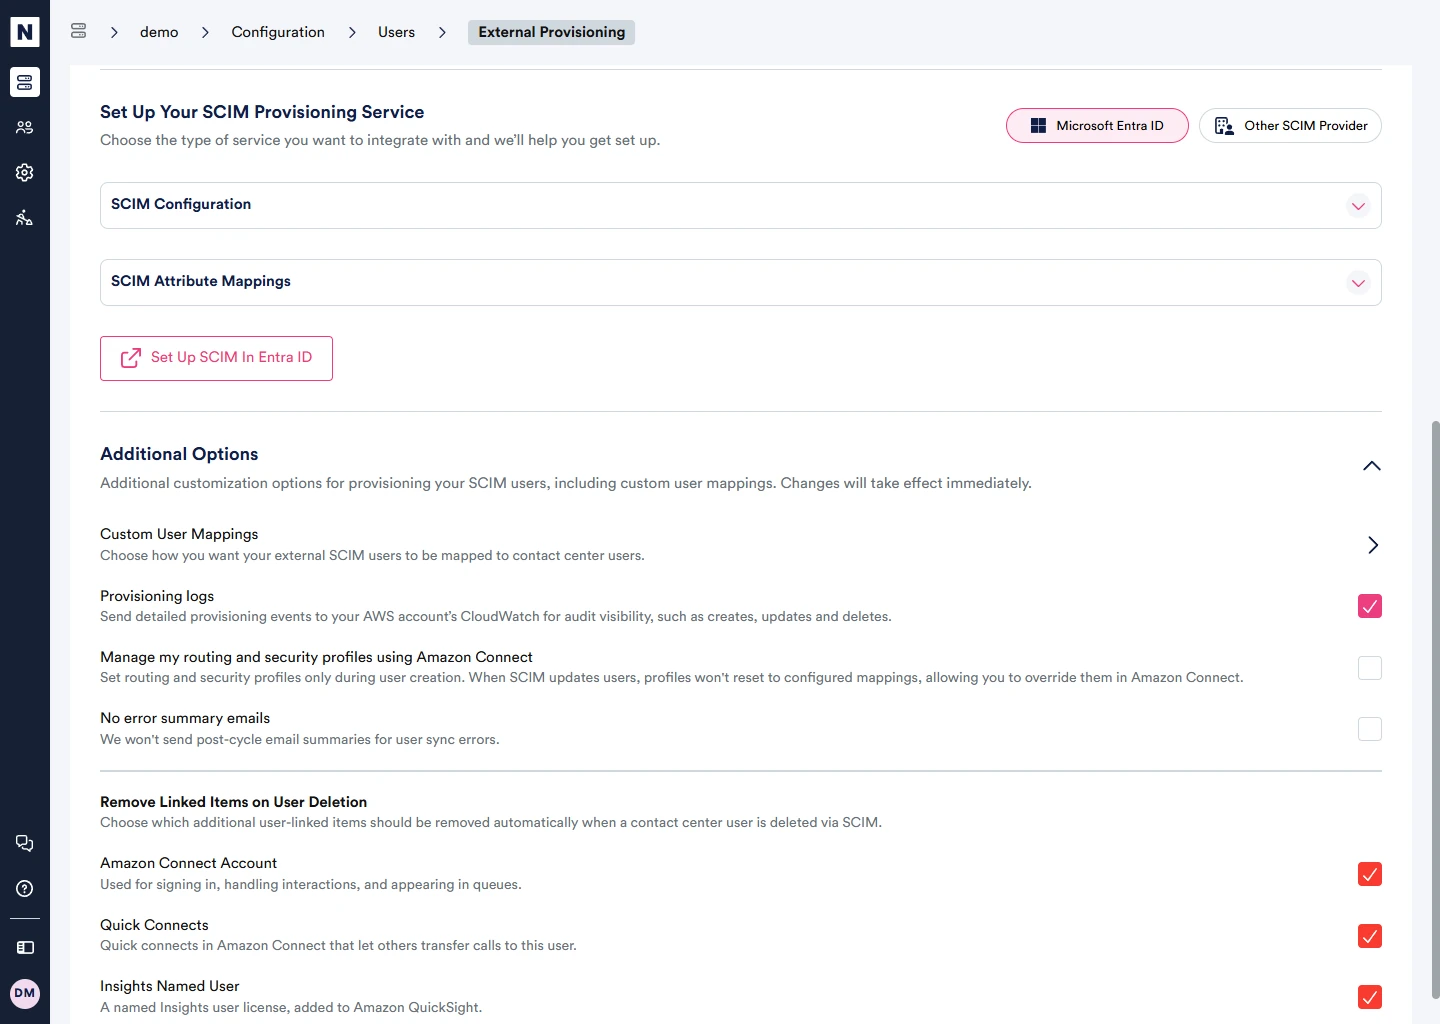
Navigate to ‘Advanced Options’, here, there are two configurations:
- “Custom User Mappings” - map each department value to a combination of Amazon Connect Security Profile, Routing Profile and NEONNOW user type. Note - multiple departments can be matches to the same combination of attributes
- “Manage my routing and security profiles using Amazon Connect” - this option utilized the SCIM interface for initial user create, but will not override routing and security groups in the event the department field is updated. Put another way, this allows these items to be managed in Amazon Connect, and will not be overwritten by SCIM at some point in the future. Use of this option depends on business requirements and business processes around user management. Step 3 - Configure the IDP
Note: Care must be taken at this point, especially if the Amazon Connect instance already has active users. Ideally this process should be performed firstly on a non-production environment, to ensure the business process is correct for each specific deployment.
Configure the IDP with the mappings shown in the table under ‘SCIM Attribute Mappings’, with provisioning configuration (endpoint URL and token) as shown the ‘SCIM Configuration Section’.
For specific instructions for Entra ID, see here.
Once configuration is added, user groups should be assigned to the Application in your IDP and provisioning should be enabled.
If a user already exists at the time of SCIM synchronization, they will remain, however will receive the relevant mapping that relates to their department, or if no department set, the default mapping.
SCIM Logs
Troubleshooting SCIM issues requires reviewing logs from both systems. Check logs from your IDP on provisioning cycles.
To enable Provisioning Logs in NEONNOW, enable Provisioning logs under the 'Additional Options' section as shown below.
Logs will be written to Amazon CloudWatch, in the format NEONNOW-[Contact Centre]SCIM-log.
Logs will be retained for 3 months by default. Logs can be ingested or redirected to other systems through Amazon Cloudwatch, for more information refer to the Amazon Cloudwatch logs documentation.