Voice Calls
Inbound Calls
Notifications
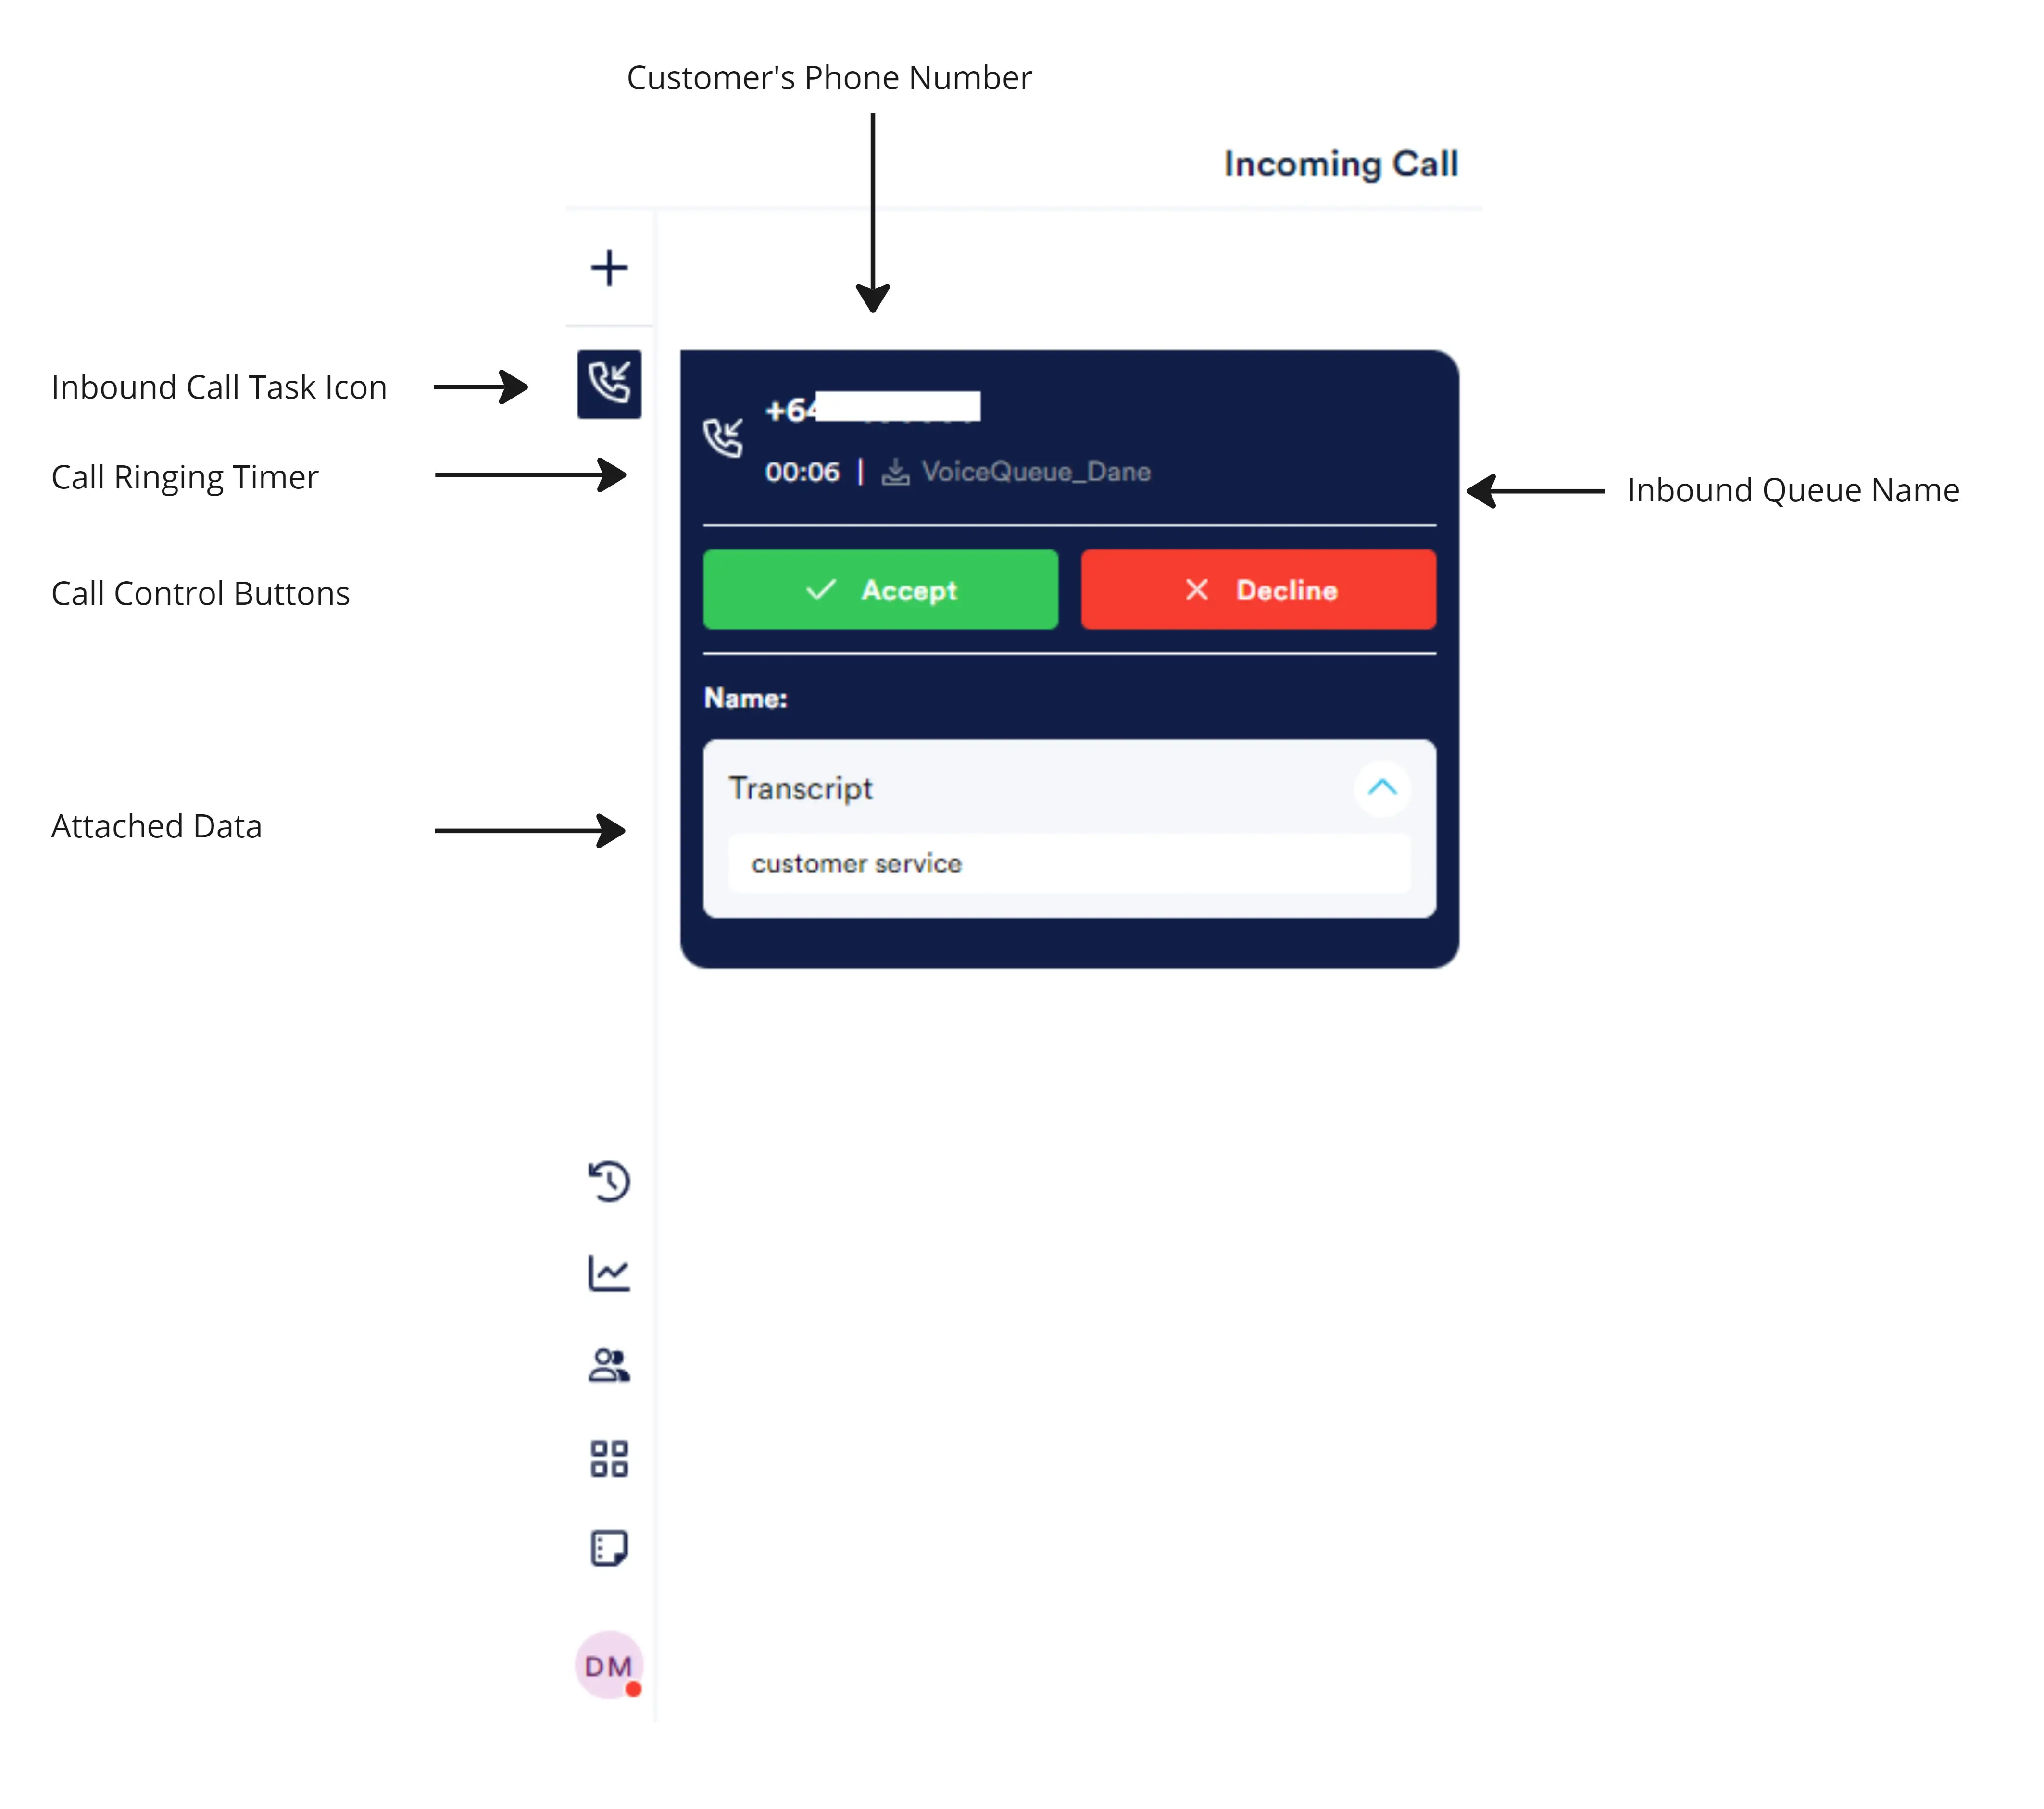
For an inbound call ringing in your NEONNOW contact centre, where manual answer is configured, you will get the following incoming call banner (indicative):
Active/Answered Call
Once the call is connected (via selecting 'Answer' or if auto-answer is configured) the connected screen will appears a follows:
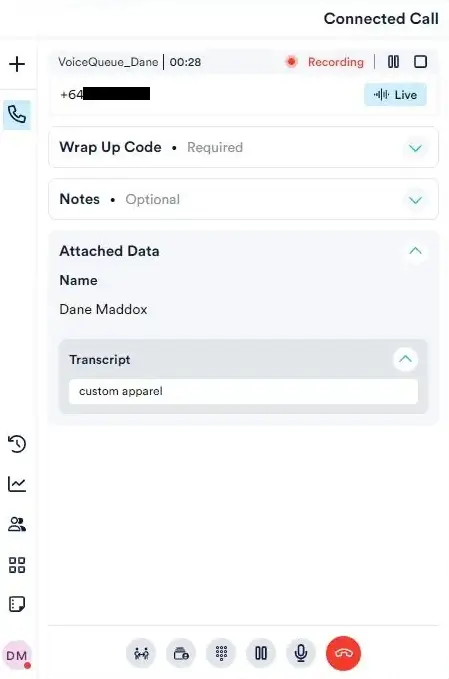
Attached Data
As per the images above, 'Attached Data' may appear in addition to the Inbound Queue Name and Customer's Phone Number. This is used to guide the agent on specifics of the customer inquiry. It might include customer-specific information or information gathered via an IVR for instance.
Recording Controls
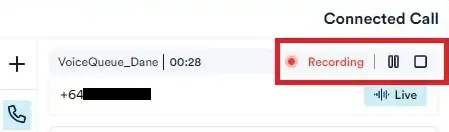
If enabled for NEONNOW instance, calls recordings can either be paused (and resumed) or stopped entirely. This may be because the customer requests to be not recorded.
Either Pause Only, Stop Only, or both Pause and Stop may be enabled in your instance.
These will appear as below for a call currently recorded:
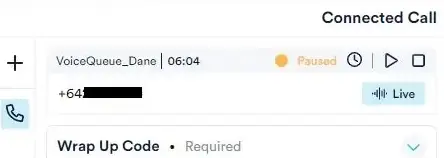
When a recording is paused, via the Pause button, the following screen will display:
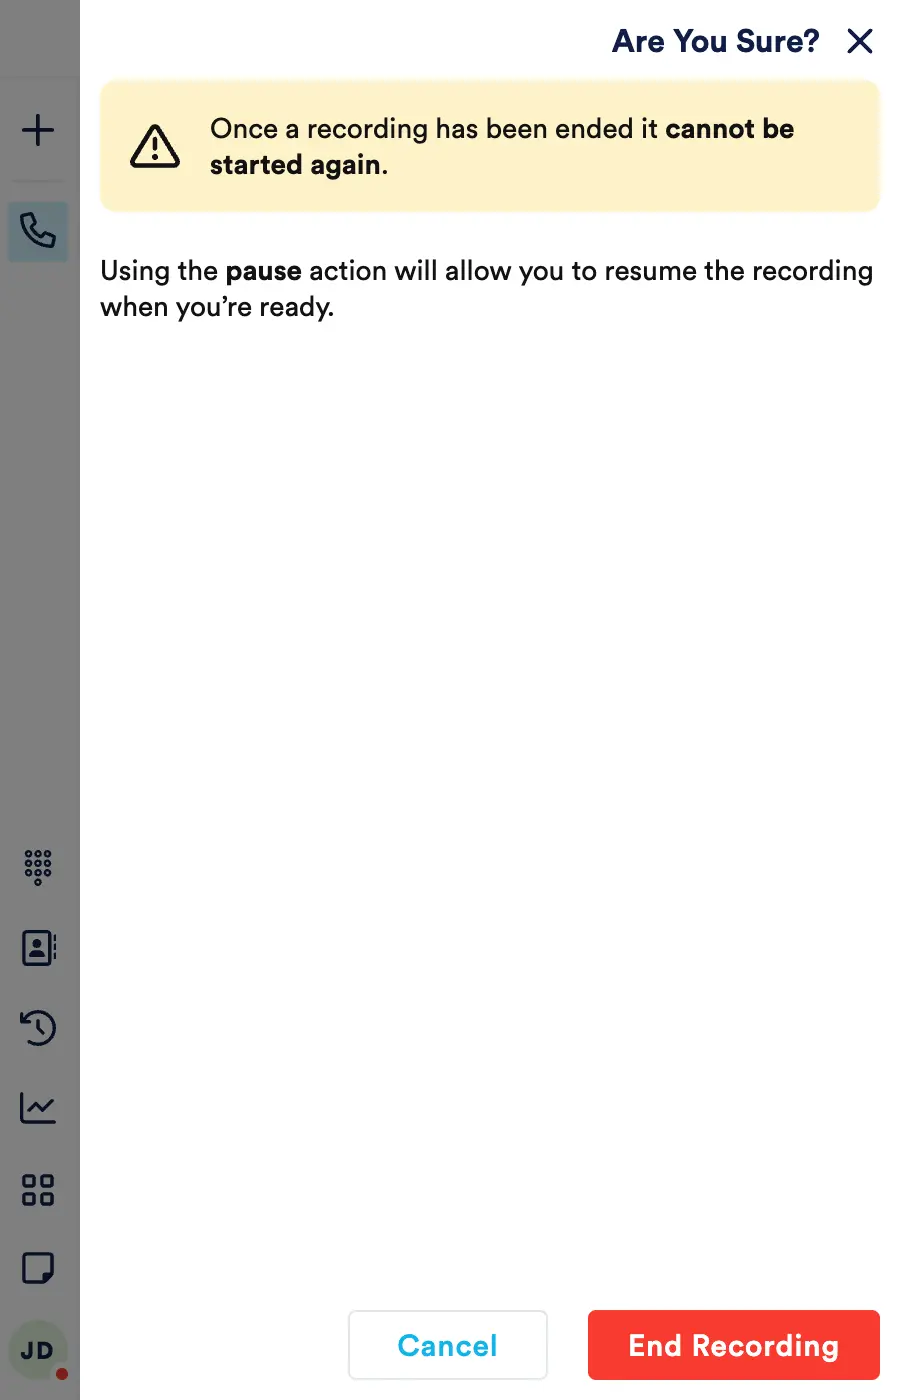
When the stop recording button is selected, this will stop recording for this interaction, and it cannot be undone. Hence, a confirmation window will appear:
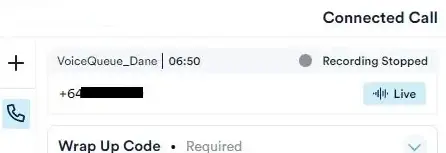
When a call recording is stopped the active call window will appears as below:
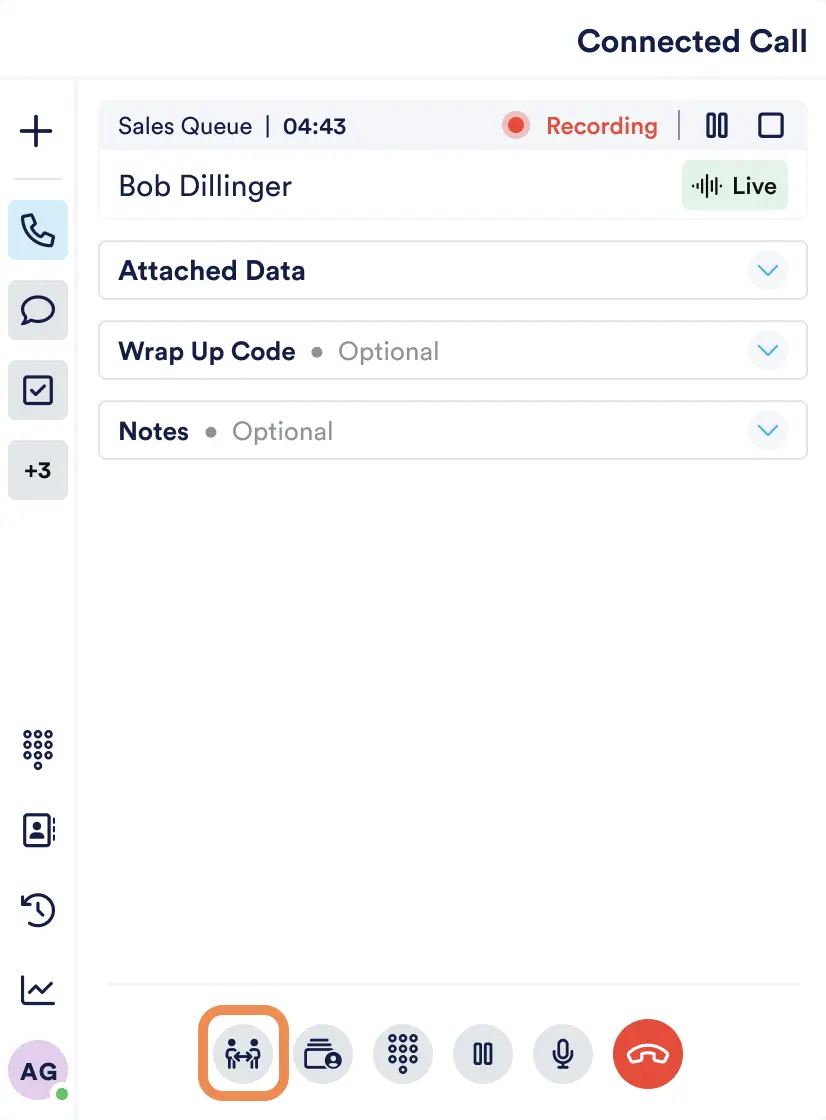
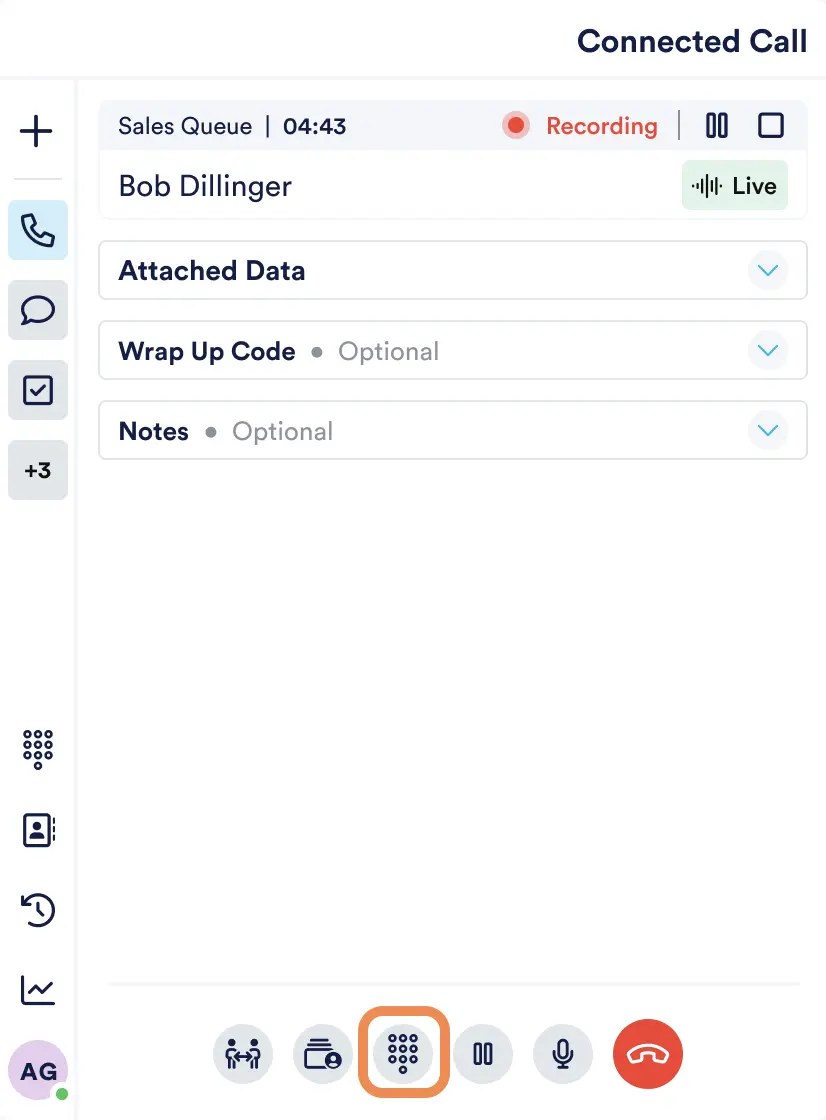
Active Call Controls
When an active call (inbound and outbound) is connected the following controls are available:

From left to right:
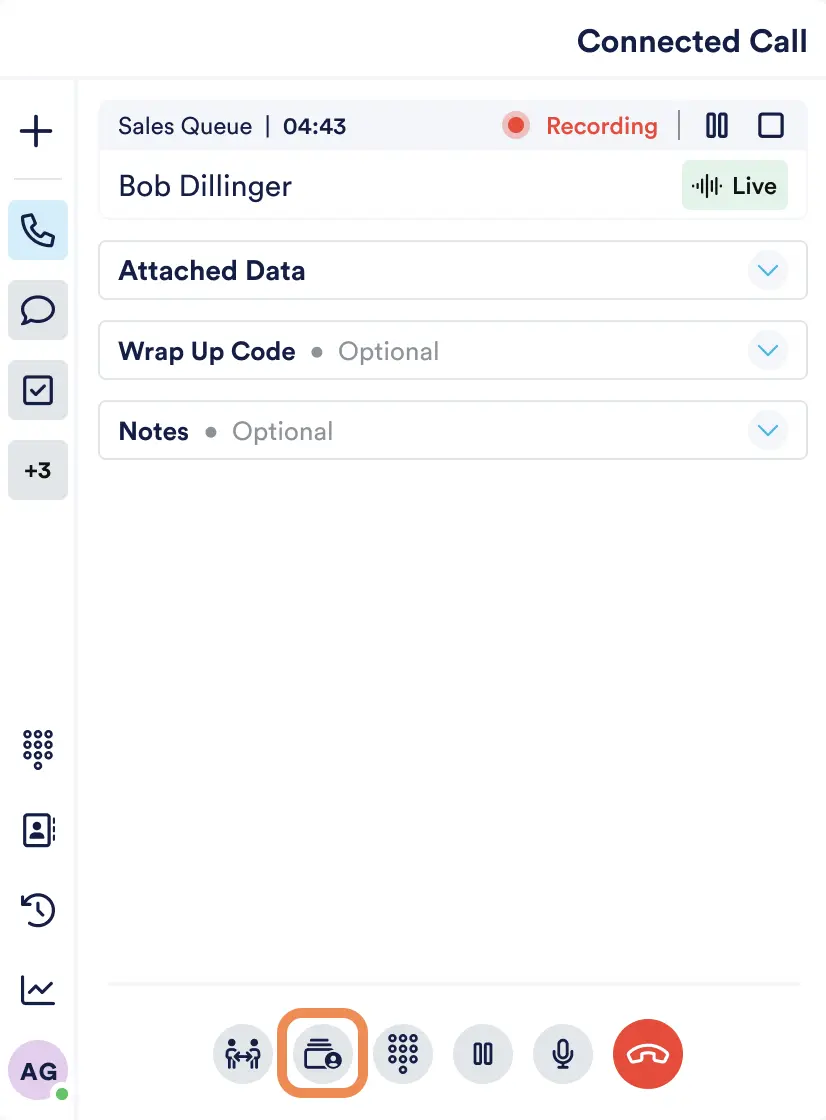
- Transfer to a Directory Contact: Transfer the call to a saved contact (external number) or Internal Agent
- Transfer to Another Queue: Transfer the call to another queue
- Transfer using Dial pad: Transfer to a phone number not saved in the Directory
- Hold: Puts the customer on hold
- Mute: Mutes the contact centre agent's microphone
- Hang Up: Ends the call with the customer
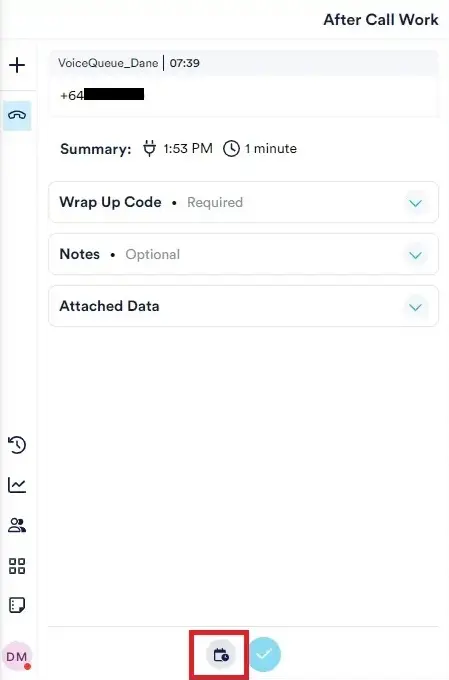
Create a Callback Task
If enabled in your NEONNOW instance, a follow-up task can be created and assigned to a queue or agent.
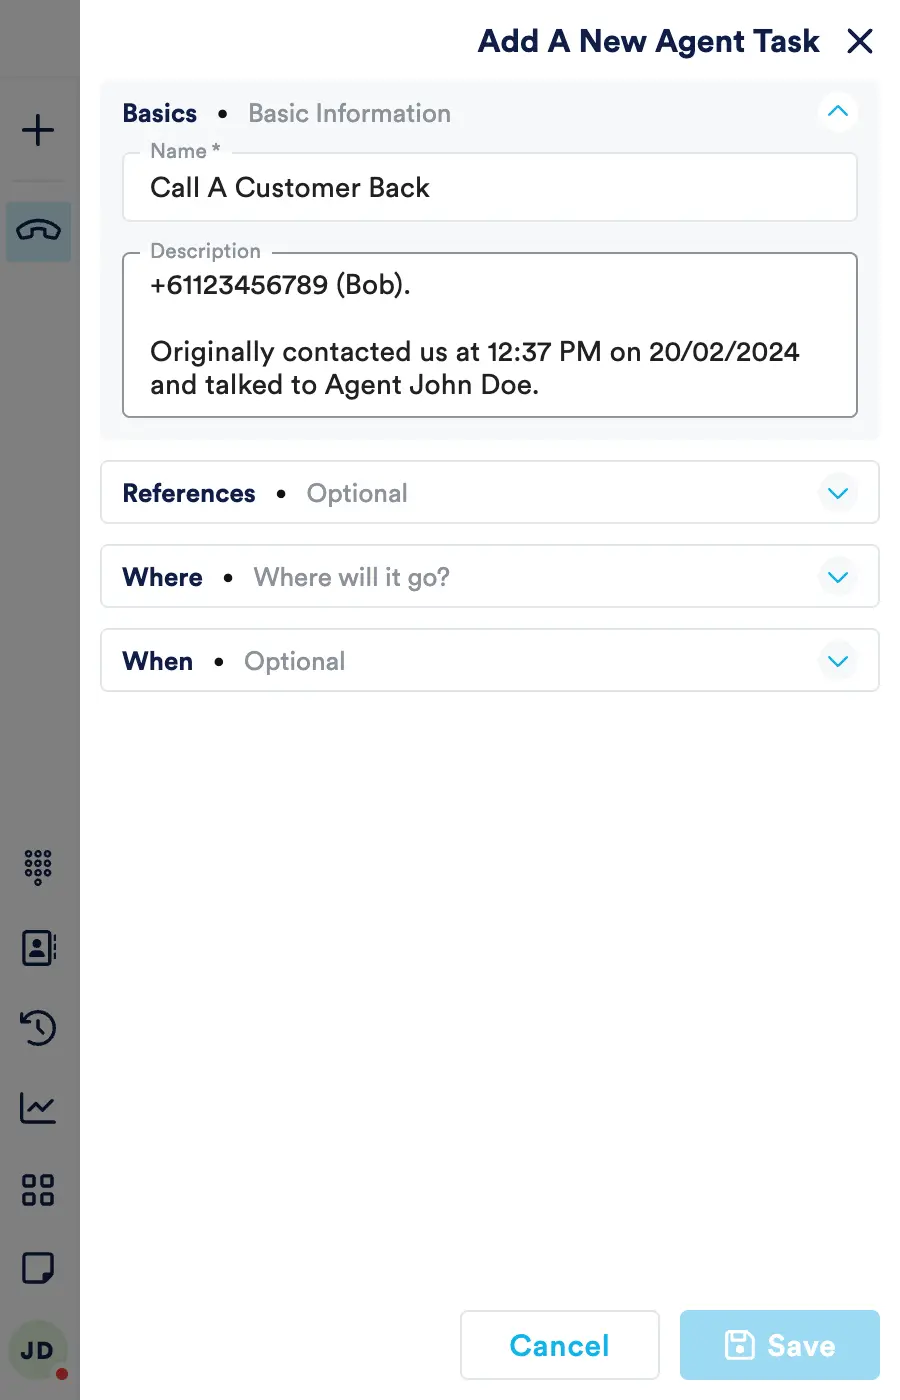
Once the button has been selected, the following screen will appear. Enter the information, including the queue or agent to sent to callback request to, then select 'Save'.
Outbound Calls
Only certain country dial codes may be available to dial. Your system administrator will have pre-configured countries that can be dialled from your instance.
Also, different wrap codes may be assigned to specific queues by your administrator.
In a US-based NEONNOW instance, to dial emergency services, dial 911.
Emergency service dialling is not available in other countries, and other phone systems such as mobiles should be used
There are a couple of ways to make an outbound call:
-
Through the dialpad - enter the phone number required, in full E164 format. E164 format is an international format, and includes the country code, but removes the local leading zero of the phone number. The dialpad is accessible in the sidebar of your contact centre.
-
Through a directory contact. For more information on Directory Contacts, see the Softphone Controls Overview in the Getting Started Guide.
Linking Calls Together
For reporting accuracy, call linking can be configured. This will link subsequent outbound calls to an original inbound call. Call linking will be carried out by the Adminstrator, by configuring attributes in the contact flows.
To override the linking behavior (for example, where an outbound call is not related to the last inbound call) unselelect 'Link to your previous call' tickbox on outbound call. Note, this is a logged activity and should align with specific agent training.
Transfers and Conferencing
A call may need to be transferred to another party to fulfill the customer's request, or you may wish to include additional participants in your call.
All transfers within NEONNOW are two-step transfers, also known as warm transfers. This means that transfers are multi-step operations. The following describes a typical transfer process:
- Select the party to transfer the call to. This will put any existing participants on hold and dial the transfer destination.
- You will now hear the new call leg, and will be connected to the transfer destination. This is the opportunity to carry out a live handover of the call/context etc.
- Once ready to hand the call over, select the
Joinbutton to take everyone off hold and be joined in a conference with the transfer Party. - To fully hand over the call, or to simply leave the conference, use the
Leavebutton in your call controls.
Note. If you have a conference with 3 participants and have one connection on hold (e.g. step 2 above) you'll be able to use a Swap button to change the party on hold. This could be useful when the transfer destination is not answering for example, or you want to go back to the customer to ask a question before completing the transfer.
Multi Party Conferencing
This feature provides additional features and an improved transfer/conference experience.
If you are unsure whether your admin has enabled this feature, look to see whether you can transfer to more than one participant. If you can, the feature is enabled. If you need further help, reach out to them for assistance.
Features include:
- Being able to add up to 6 participants (maximum is 3 with this feature turned off)
- See yourself as a participant, with the ability for your own connection to be on/off hold
- As an agent being transferred to, the ability to see all conference participants and control all connections
Below, we will walk you through the transfer/conferencing experience with this feature turned both on and off. We will use 1 to denote an item requires this feature to be enabled.
Initiating a Transfer (Adding Participants)
There are few different types of voice transfer, which we cover below. If you are setting up a conference, the process will be the same, where adding additional participants is simply transferring to more people.
If a call is being transferred to you and Multi Party Conferencing is disabled, you will see a voice call, not a conference. If Multi Party Conferencing is enabled, you will also see a conference.
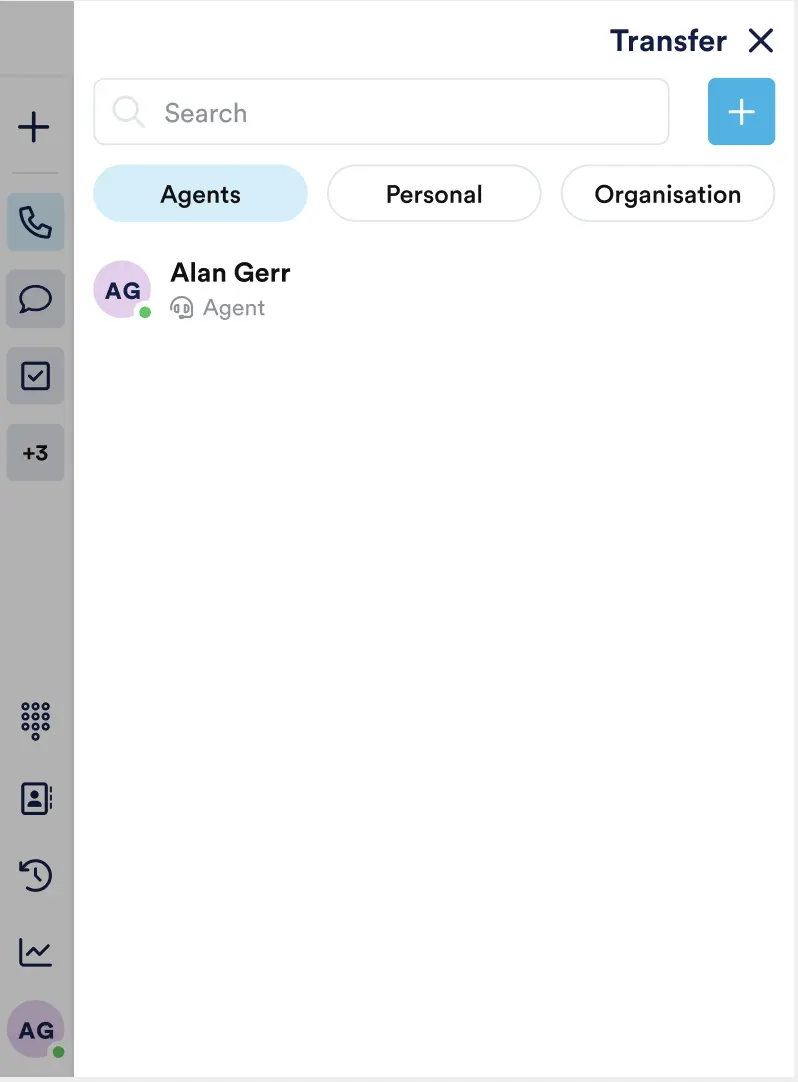
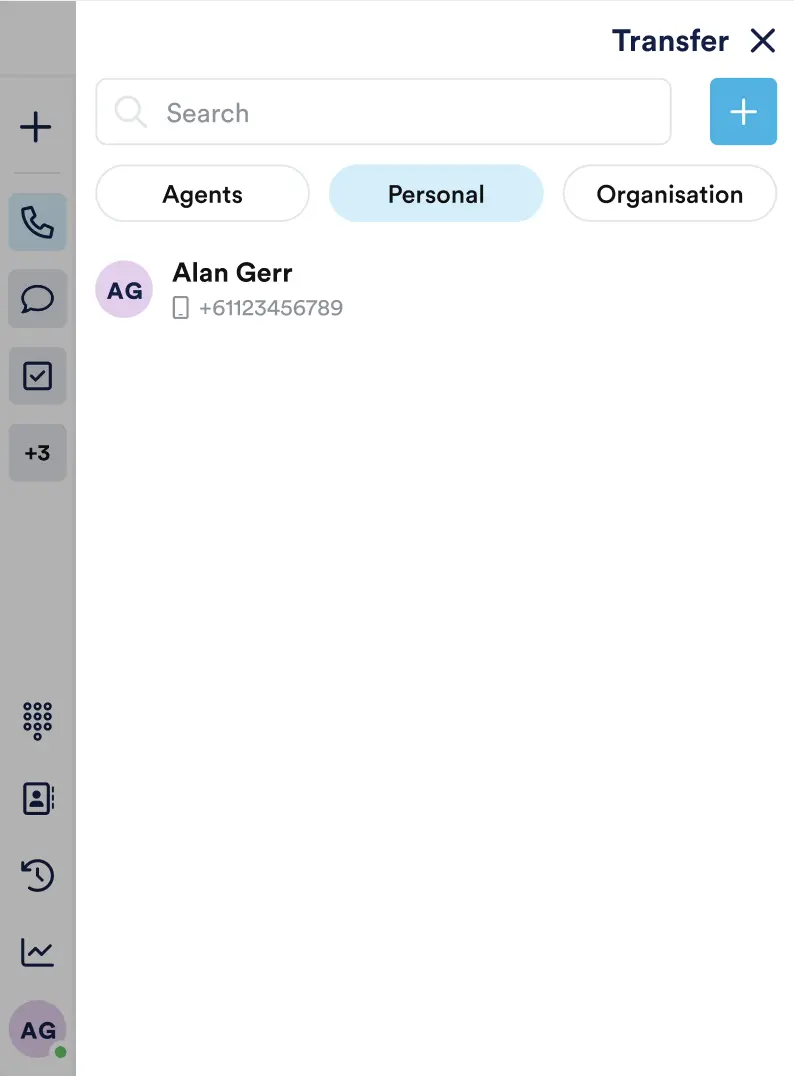
To Agents Or Directory Contacts
In an active call, select the Transfer to a directory contact button:
This will bring up the Transfer Window. Select the directory entry to transfer the call to. The Search textbox can be used to restrict results. Select the directory contact to transfer the call to. The following Directory types are available:
- Agents - other contact centre agents within the same NEONNOW instance. You will see their current state
- Personal - contacts that you have individually saved
- Organisation - contacts that have either been saved across the organisation, or been ingested from a 3rd party directory (e.g. Microsoft Teams)
*Agent Directory - * select the agent to initiate the transfer:
*Personal Directory - * select the contact to initiate the transfer:
*Organisation Directory - * select the contact to initiate the transfer:

Once the contact has been selected, the active conference screen will appear. The customer will be put on hold.
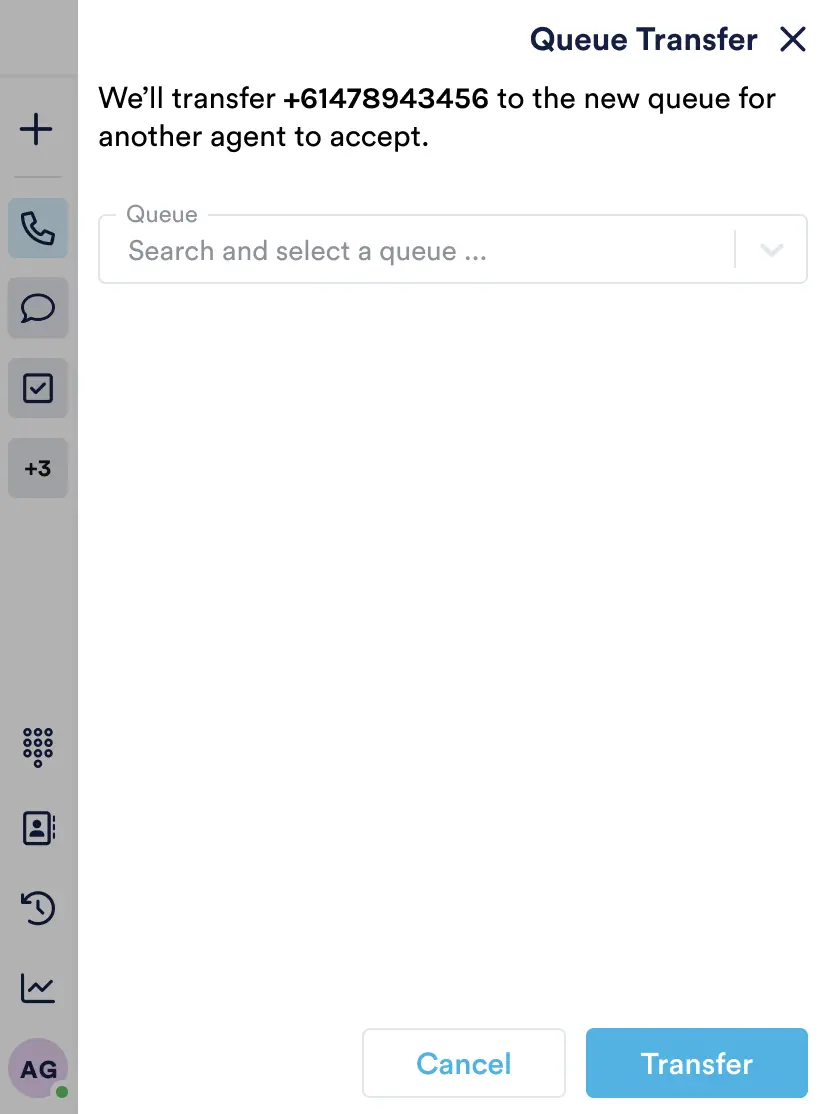
To Other Queues
To transfer the call to another queue, select the Transfer to Another Queue button:
In the modal window that appears, select a queue from the Queue Drop-down & select the Transfer button:
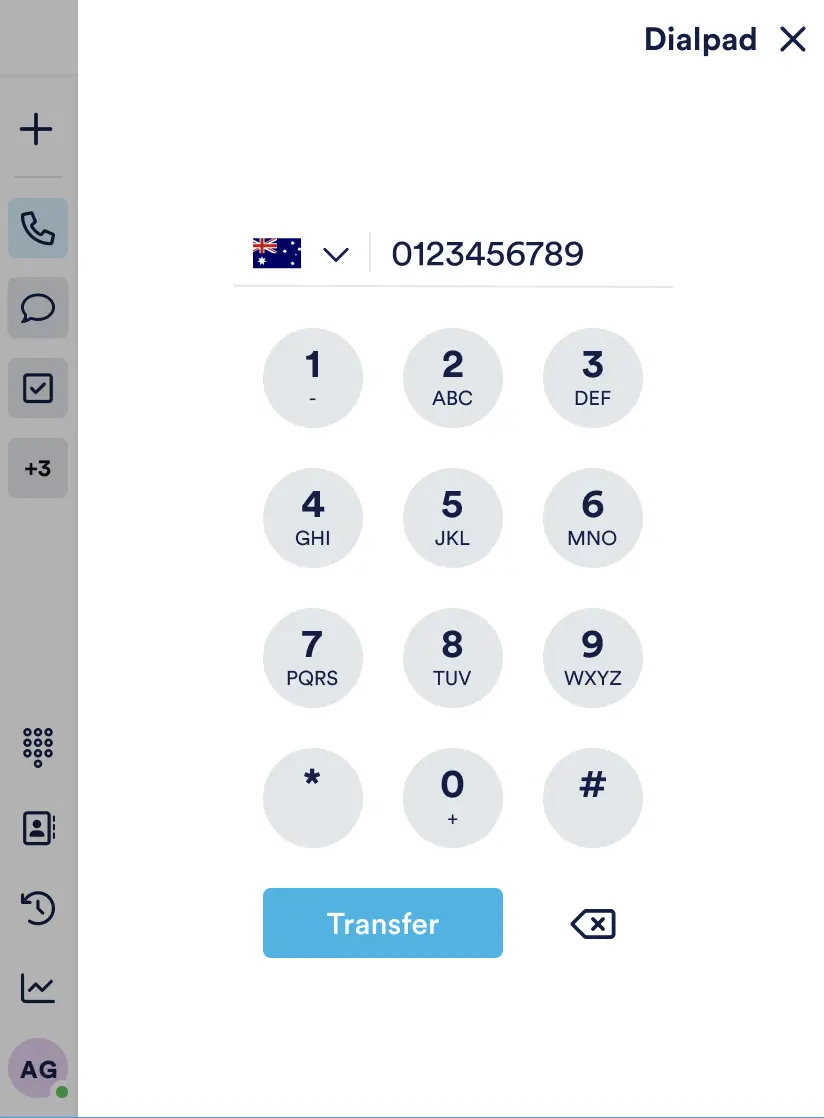
To External Numbers
Calls can be transferred to an external number via the Dialpad - for instance for one-off transfers. To transfer using the dialpad, select the Dialpad button.
Enter the number and select 'Transfer' to initiate the transfer.
Your Conference��
Once you've transferred to your first party (added your first additional participant) your call will display as a conference.
You As a Participant
When Multi Party1 is enabled, you will always see an entry in the conference for yourself. From here you can see if you've been put on hold and manage your own connection. You'll notice the remove connection button is always disabled for You. Use the Leave button in your call controls if you want to end your own connection.

Your participant row in a conference
When Multi Party1 is disabled, you will not appear in the list of participants. If you were added as a participant by another agent, you will additionally see a voice call, not a conference call.
3 Participants
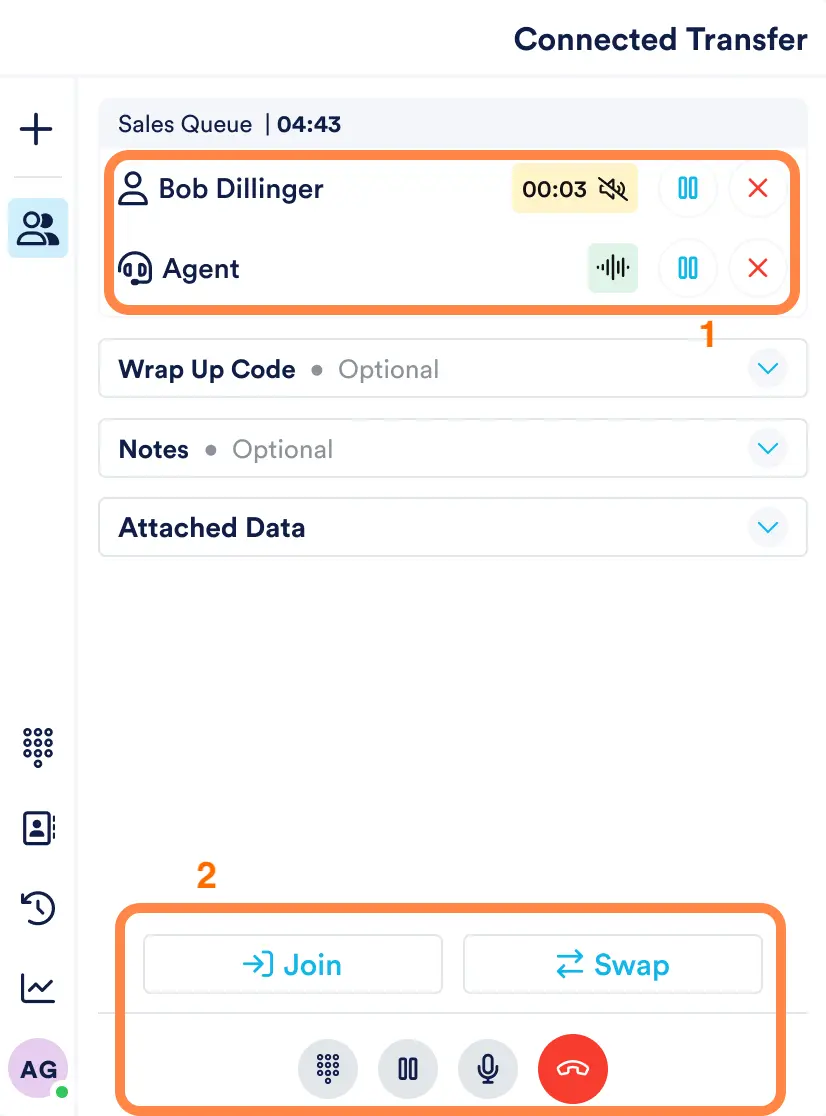
Once an active conference is initiated (to a directory contact, queue or entered phone number), the original customer will be placed on hold and you will be connected to your transferred party (see initial screenshot below), where you can carry out the following actions:
- Remove the transfer destination from the conference: For instance if the transfer party is not picking up the call, or a mistake was made the transfer party can be dropped. Note. the customer will still be on hold and will have to be taken off hold.
- Join all parties - this will take both you1 and the customer off hold and all 3 parties will be on a single conference call
- Swap the person on hold - this will take the customer off hold and place the transfer party on hold
- Leave the conference - this will take the customer off hold and connect the customer to the transfer party. You will be removed from the conference.
- Transfer to more parties (add participants) 1 - add up to 3 additional parties to the conference call
- Put yourself on hold 1 - place yourself on hold, e.g. you don't want to hear the conversation between a transferred party and the customer
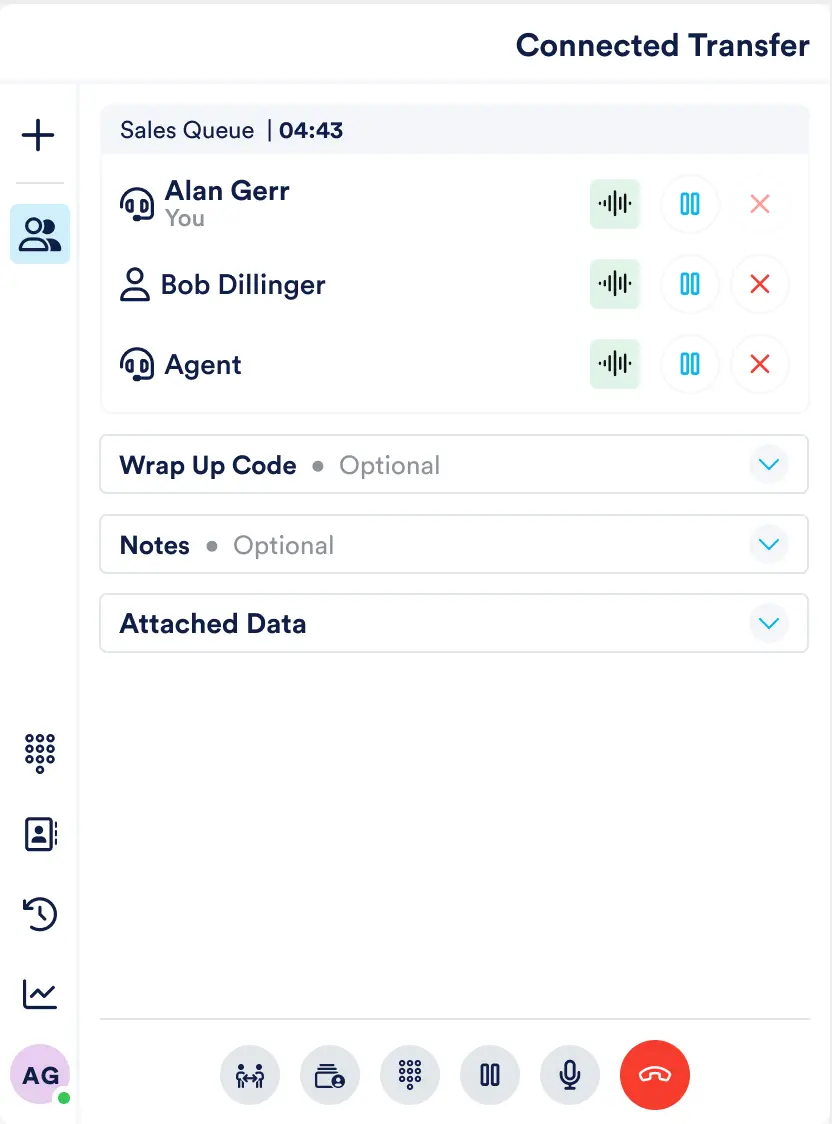
The following shows the initial state of the conference - party 1 is on hold, party 2 (new party) is connected (Live). The third party you added/transferred to may show as connecting for a while.
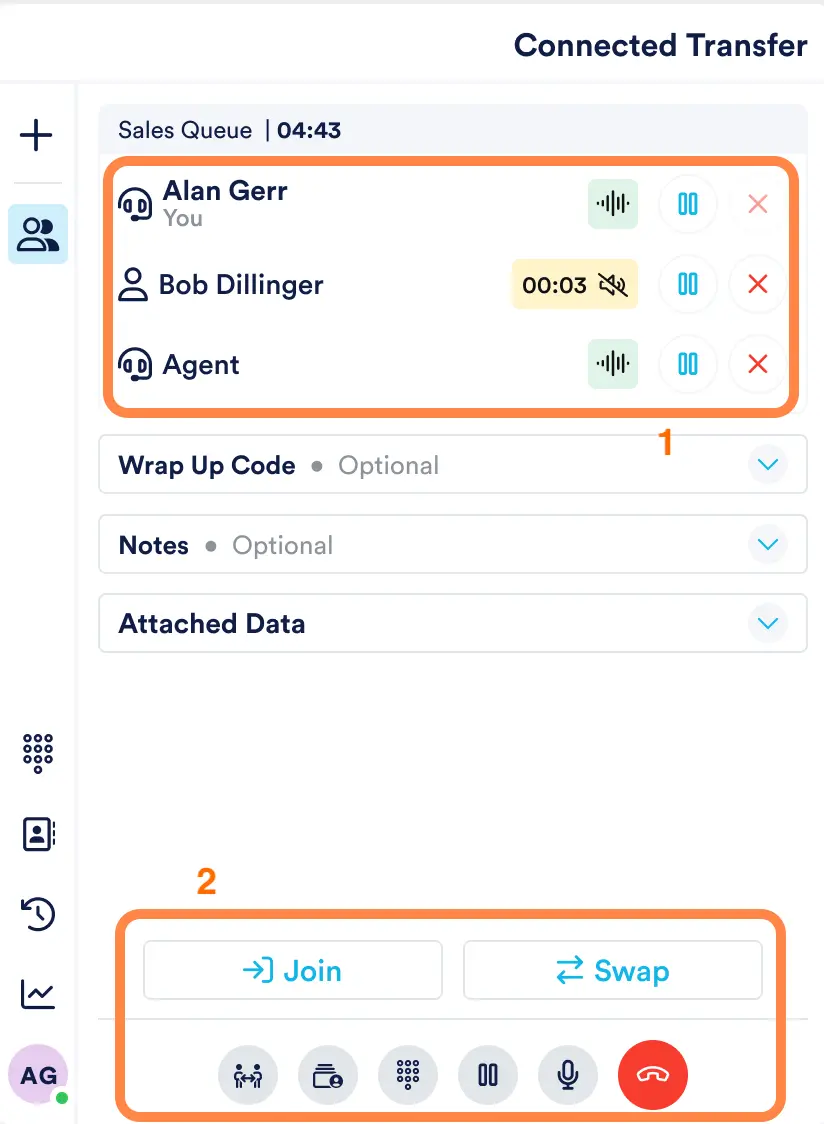
First: With multi party conferencing disabled | Second: Multi party conferencing enabled
- Conference participants and their respective states. Each participant has individual controls:
- Hold/resume participant
- Remove the participant from the conference
- Conference control buttons (left to right):
Top Row
- Join everyone on the call
- Swap the person on hold
Bottom Row
- Add an additional agent to the conference1
- Transfer to a queue1
- Dialpad - transfer to an additional participant1 or use the keys in your call
- Hold all parties
- Mute microphone
- Leave the conference
The following shows the screen once the agent has joined all parties - all parties (customer, original agent and transferred agent) are connected in a conference call.
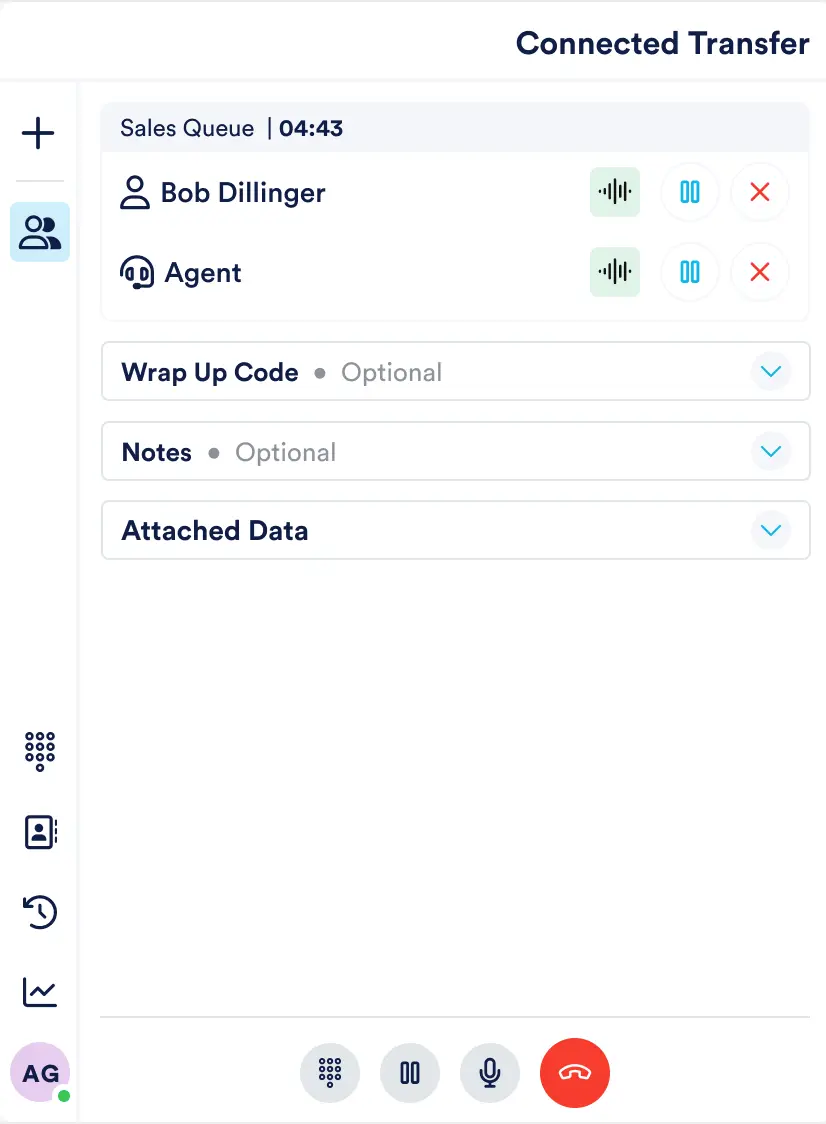
First: With multi party conferencing disabled | Second: Multi party conferencing enabled
More Participants (Up to 6)
If your admin has not enabled Multi Party Conferencing you will not be able to transfer to more parties / add additional participants.
When multi party is enabled, you will be able to add up to 4 additional participants to your original call. All agents in the conference will be able to add and remove participants, as well as hold or resume individual connections.
NEONNOW will consistently present your conference interface, irrespective of whether there are 3 participants or 6. You'll retain the ability to transfer to additional participants using the designated buttons mentioned above until the participant limit is reached.
Once your conference hits its participant limit, NEONNOW will automatically hide the buttons indicated above, typically used for transferring to additional participants. The dialpad button, however, will remain accessible, allowing you to utilize your phone's keypad during the call.
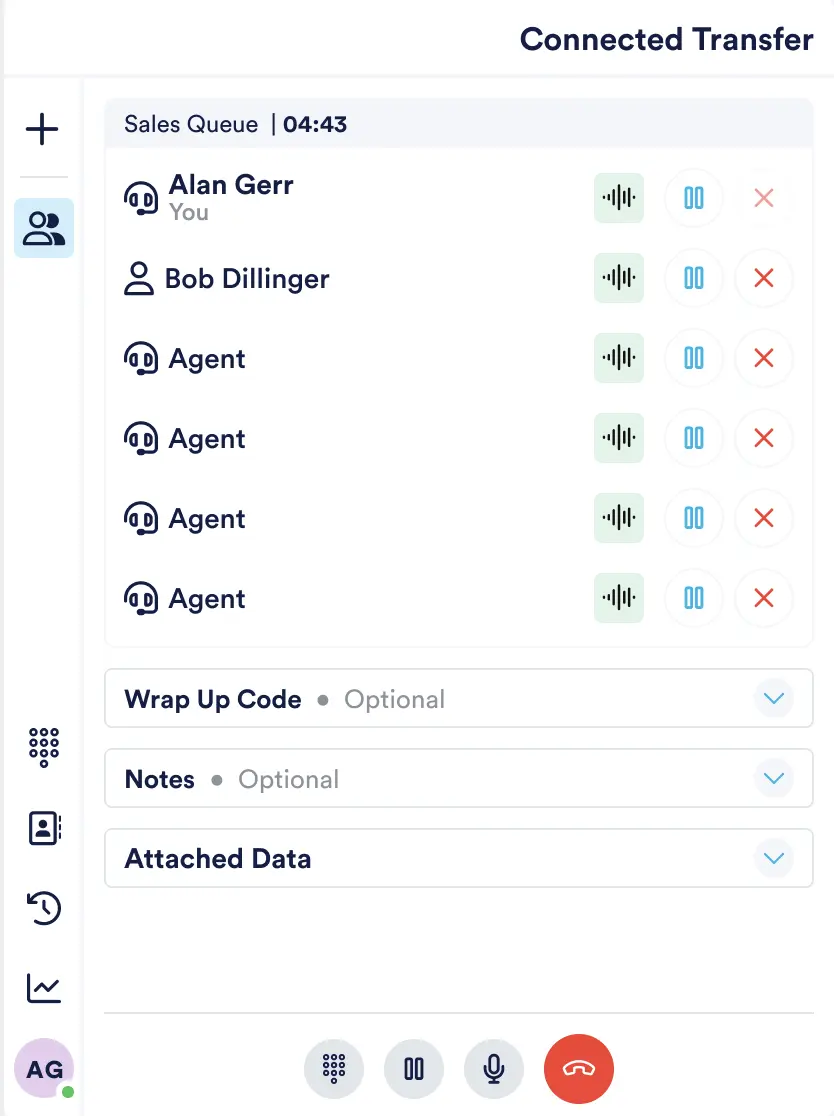
6 participants in a conference call
Leaving the Conference
When either:
- You leave the conference
- Everyone else leaves the conference
if your admin has enabled ACW, you will be shown the ACW screen. Any other participants in the conference will remain in the call (if applicable).
Wrap Codes & Notes
Please refer to ACW Wrap Codes.